

Vertical Tub Full Setup – Delivery & Setup
🚚 When Your Vertical Cold Tub Ships
Your Vertical Tub Full Setup ships via FedEx Freight. Once your order has shipped, you’ll receive an email from FedEx Freight to schedule your delivery window.
Please review the instructions below ahead of time and keep them handy for delivery day.
📦 Delivery Day
Please be present during delivery to guide the FedEx team.
Your order will arrive in 2 boxes, securely packaged on a pallet. While we take every precaution to protect your Cold Creek Tub and provide handling instructions, FedEx uses different drivers nationwide—so your guidance helps ensure a smooth delivery.
Ensure FedEx removes the boxes from the pallet upon arrival. The tub only weighs 82 lbs empty, and can be easily moved into place. Always keep the chiller box upright during handling and setup to prevent damage.

⚠️ IMPORTANT:
Before setup, allow the chiller to sit upright for 24 hours. This step is required to prevent damage and is not shown in the video.

🛠 Step-by-Step Instructions:
Unbox your Vertical Cold Tub (taller box)
- Tilt the taller box to make it easier to slide the tub out


Choose your placement
- Place your tub in your desired location, recommended near an outlet and hose connection for convenience

Open the All-in-One Cooling & Filtration Unit
⚠️Important: We ship the chiller with protective shims under the compressor to prevent damage during transit. These must be removed before use.
Remove small door - Remove Shim #1:
- Remove the small side door on the chiller unit
- Inside the small door, remove the bottom screw & pull out the white shim


Remove front chiller door - Remove Shim #2
-
On the front of the chiller, remove the bottom screw & pull out the second white shim

Reinstall both doors on the chiller unit

⚠️ Important: Let the chiller sit upright for 24 hours. ⚠️
Before proceeding, allow the chiller to sit upright for 24 hours. During shipping, the unit may be laid on its side. Operating the chiller before it has been upright for 24 hours can cause damage.
We know you’re eager to start plunging — thank you for your patience. If you’d like to use the tub immediately, you may fill the tub with water and add ice, but please wait the full 24 hours before turning on the chiller.
Install the Child Locks
- Reach inside the cold tub for a baggie with the child locks
- Using a phillips head screwdriver, screw in both child locks

Unbox the All-in-One Cooling & Filtration Unit Box (smaller box)

Tilt the Tub on Its Side
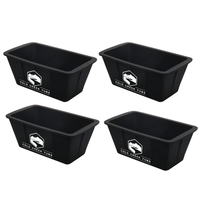
- From the smaller box with the chiller, take out the black soft foam pieces
- Place the foam on the ground to protect the tub from scratches
- Carefully tilt the tub onto its side so it rests on the foam, with the hose spigot and plumbing facing upward for the next installation step

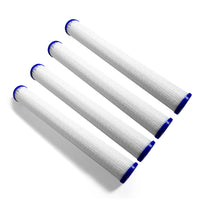
Install (lower) plumbing - with gold spigot
- Take the larger plumbing piece from the smaller box (the one with the gold drain at the end)
- Thread it onto the lower plumbing port on the tub. Twist until 2 threads are still visible. ⚠️ Do NOT overtighten. Tightening too much can crack the bulkhead fitting.
- The finished position should sit horizontal to the ground.

Install (upper) plumbing - with gold spigot
- Take the smaller plumbing piece from the smaller box
- Thread it onto the upper plumbing port on the tub. Twist until 2 threads are still visible. ⚠️ Do NOT overtighten. Tightening too much can crack the bulkhead fitting.
- The finished position should sit horizontal to the ground.

Confirm both valves are open (parallel) to plumbing


🎥 Video: Understanding the valves
Attach the All-in-One Cooling & Filtration Unit to your tub
- Move the All-in-One chiller unit next to your Vertical Cold Tub
- Thread both plumbings from the chiller onto the plumbing fittings on the tub — ensure they are hand-tight and secure
- Double check both valves are parallel to plumbing
-
Push the chiller unit gently toward the tub until it sits snug against it


Fill with water
- Fill your tub with a garden hose — we recommend about 12 inches from the top
- Adjust the level as desired for your height and comfort
- 💡 Tip: Place the lid loosely on top of the hose to hold it in place while filling

Power on electrical
-
Plug the chiller into a standard 110V outlet (extension cord works great)
-
Once powered, you should see the jets & bubbles start circulating water
- If water is not flowing, press the water release button on top of the chiller

Set your temperature
- Press and hold SET for 5 seconds. Use ▲ / ▼ to select your desired temperature. Press and hold SET again for 5 seconds to program.
- The display will show the current water temperature (the set temperature will display if press SET quickly)
- Allow 12–24 hours to reach your target temperature, depending on your starting water temp. To speed up cooling and start plunging sooner, feel free to add ice directly to the water

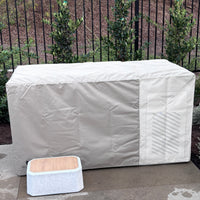
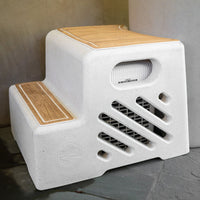
You are all set! Place the enclosed step over your chiller unit, and you are all set!
🙋 Need Help?
If you need help with setup or troubleshooting, email us a photo or video along with a quick description of your issue so that we can assist. We're here for you!
📞 Call/Text: (909) 232-8920
🌐 Visit: coldcreektubs.com or check out these helpful resources:
We’re excited to have you in the Cold Creek family — enjoy your new cold tub!